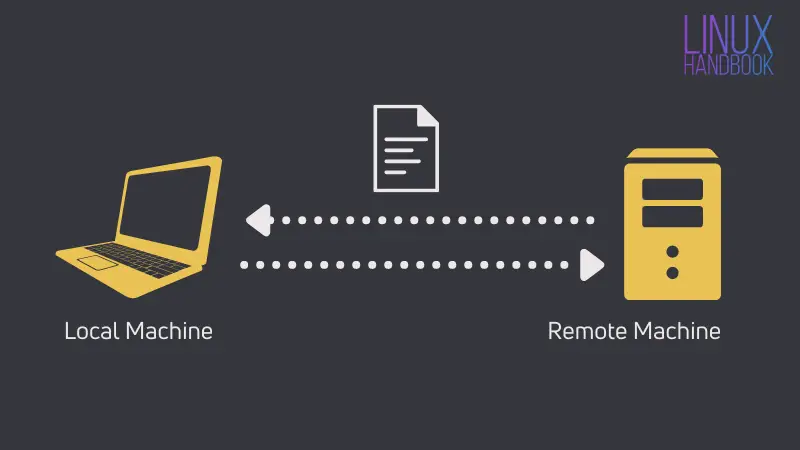
SCP reads for Secure Copy Protocol, which uses SSH to securely copy files over the network. Personally, I found this command quite helpful as I constantly play around with multiple VMs for testing.
But the question is: How do you use this command? Well, you start with the correct syntax and some examples. To learn more, you practice, right?
Fret not, I will be sharing everything you need to get started and get better with the scp command in Linux.
Here's how to use the scp Command in Linux
Let us get started with the syntax, so here's the format for the scp command:
scp [options] [user@]sourceIP:path/to/file [user@]destinationIP:path/to/destinationThe syntax looks a bit complex. Right? Don't worry, I'll break it down for easy understanding.
Here,
[options]: it is used to tweak the default behavior of the scp command, such as using the-roption to copy files recursively.[user@]sourceIP:path/to/file: here, you specify the source IP address of the machine on which the file is located and mention the path of the file. For example, if I want to copy thesimple.txtfile from198.168.1.1IP, then I will use this:[email protected]:path/to/simple.txt.[user@]destinationIP:path/to/destination: here, you specify the username and IP address along with the path where the file needs to be copied. For example, if I wish to copy the file to the192.168.1.5IP at/home/fileslocation, then, here's what I type:[email protected]:/home/files.
Now that we know the basics, let us take a look at widely used options of the scp command:
| Option | Description |
|---|---|
-P |
Specify the port to connect to the remote host. |
-p |
Preserve modification time, and file mode bits of the original file. |
-q |
Enable quiet mode to suppress any errors or warning messages. |
-C |
Force SSH to compress the data being sent to the destination. |
-r |
Copy files recursively. |
Hold on ✋
Before we jump to the examples of using scp command in Linux, here are 3 things to keep in mind:
- Both the remote and local machine should have SSH installed, if not, here's how you can install SSH on Ubuntu and other Debian-based distros.
- Make sure you know the password of the remote machine and that the firewall (if enabled) is configured to allow SSH connections.
- You need to know the IP address or hostname of the remote machine.
Considering you know the essentials, I will now walk you through 10 practical ways you can use the scp command in Linux, ranging from basic to advanced examples.
So let's start with sending files from local to a remote machine.
1. Send a file from local to a remote machine
To send a file from your local machine to the remote machine, you can use the scp command in the following manner:
scp /path/to/file [user@]destinationIP:path/to/destinationYes, if you are sending files to a remote machine, then, you don't have to specify the source username and IP address.
For example, here, I've sent the Sample.txt file to my remote machine inside of the ~/Documents directory:
scp Sample.txt [email protected]:~/Documents/
2. Send a file from the remote machine to the local computer
To send a file from the remote machine to your local computer, you can use the scp command in the following manner:
scp [user@]sourceIP:path/to/file /location/in/local/computerFor example, here, I copied Sample.txt file from the remote machine to the local computer inside my home directory:
scp [email protected]:~/Sample.txt ~/
3. Send files between two remote machines
If you want to send files between two remote machines, then, you'd have to specify the username and IP address of both machines as shown:
scp [user@]sourceIP:path/to/file [user@]destinationIP:path/to/destinationFor example, here's how I've sent myfiles.txt from one to another remote machine using the scp command:
scp [email protected]:~/myfiles.txt [email protected]:~/Documents/
Unlike the previous examples, when you send files between two remote hosts, it won't show you any output after sending the file, so you will have to check it manually.
This is the reason, in the above snapshot, I logged into the VM (on the right window) and captured the result before and after executing the scp command to show you the difference.
4. Specify the SSH port (if you use a different SSH port)
By default, SSH uses port number 22. But if you configured the remote host to use SSH on a different port, then you can use the -P flag to specify the port:
scp -P <port> /path/to/local/file [user@]destinationIP:path/to/destinationLet's say my remote host is configured to use port 2222, so, I'll be using the following command to send a file from my local machine to the remote host:
scp -P 2222 ~/Sample.txt [email protected]:~/
5. Preserve modification time using scp
By default, when you send a file through scp, it will change the time (modification time) with the time when the file was received, so you lose those important details.
But the good news is you can preserve those timestamps using the -p (note: lower case p) flag as shown here:
scp -p [user@]sourceIP:path/to/file [user@]destinationIP:path/to/destinationFor example, here, I sent a file from a local to the remote machine with the -p flag to preserve timestamps:
scp -p ~/Sample.txt [email protected]:~/
Here's the difference between sending files with and without the -p flag:

6. Send file quietly (suppress output messages)
If you want to ignore output, error, and warning messages while sending files using the scp command, then you can use the -q flag as shown here:
scp [options] [user@]sourceIP:path/to/file [user@]destinationIP:path/to/destinationFor demonstration, here, I have used the -q flag while sending files from local to remote machine:
scp -q ~/Sample.txt [email protected]:~/
7. Compress files for faster transfer
No, it will not create a compressed archive of your file. The compression will be valid for the sake of transferring the file. Once done, it will look and behave the same as the selected file.
To compress the file with the scp command, you will have to use the -C flag as shown here:
scp [options] [user@]sourceIP:path/to/file [user@]destinationIP:path/to/destinationFor example, here, I have sent a video file which is 3.4 gigs in size, it took me around one and a half minutes to transfer:
scp -C ~/Movie.mkv [email protected]:~/
8. Send an entire directory
On Linux, you call it sending files recursively, but in layman's terms, you can also call it sending an entire directory.
To send files recursively, you use the -r flag as shown here:
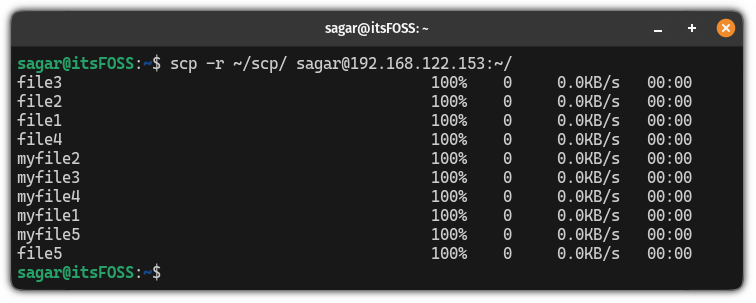
scp -r [user@]sourceIP:path/to/directory [user@]destinationIP:path/to/destinationFor example, here, I want to send the scp directory, so here's how I used the -r flag to send all the files recursively:
scp -r ~/scp/ [email protected]:~/
Practice questions 📓
Here are some practice questions that you can refer to get better at using the scp command:
- How would you send all files ending with the
.txtfile to the remote server? - Suppose your remote server is configured to listen to SSH on port number 2345, so how would you send files to it?
- How do you copy an entire directory using the scp command?
- How do you compress a long file for efficient transfer?
- How do you send files between two remote servers while keeping the modification time intact?
If you find difficulty solving the above questions, you can reach out to us through comments, or you can also visit our community forum.
More ways to send files over SSH
If you want more options but with the assured security of SSH, refer to our detailed guide explaining 4 ways to send files over SSH:

Additionally, you can explore other ways to transfer files between different platforms:

💬 What is your preferred way of transferring files across systems? Do you find a command like scp handy for your use-case? Let me know your thoughts in the comments below.
from It’s FOSS https://ift.tt/2ODVeXq


